10 Ways to Incorporate Blocks to Elevate Your Practice

By Kelli Harris

Incorporating yoga blocks into your practice can be a game-changer, making postures more accessible and enhancing your overall yoga experience. Whether you’re looking for additional support or seeking something new in your practice,  yoga blocks are a valuable addition to your toolkit.

Benefits of yoga blocks:

  • Provide support, stability, and accessibility 
  • Utilize block(s) as a stilt/support in poses like balancing half-moon or standing splits.
      • Transitions can be safer and more accessible when utilizing blocks, such as from downward facing dog to low lunge. 
  • Improve alignment
      • Placing blocks under your hands can bring the mat closer to you, preventing strain or injury. 
      • The placement of blocks can help improve body angles in each posture, maximizing benefits while ensuring safety.
  • Allow a deeper stretch
      • Blocks can allow you to deepen into a stretch progressively, without compromising form. 
      • Enhance postures within your practice for a different sensation. 
  • Versatile & Progressive: 
    • Blocks can provide support, but can also create an additional challenge. 
    • Blocks can be utilized at three different heights, so can be customizable to your practice and body.
    • As your flexibility and strength fluctuate throughout your yoga journey, so can your utilization of blocks. 

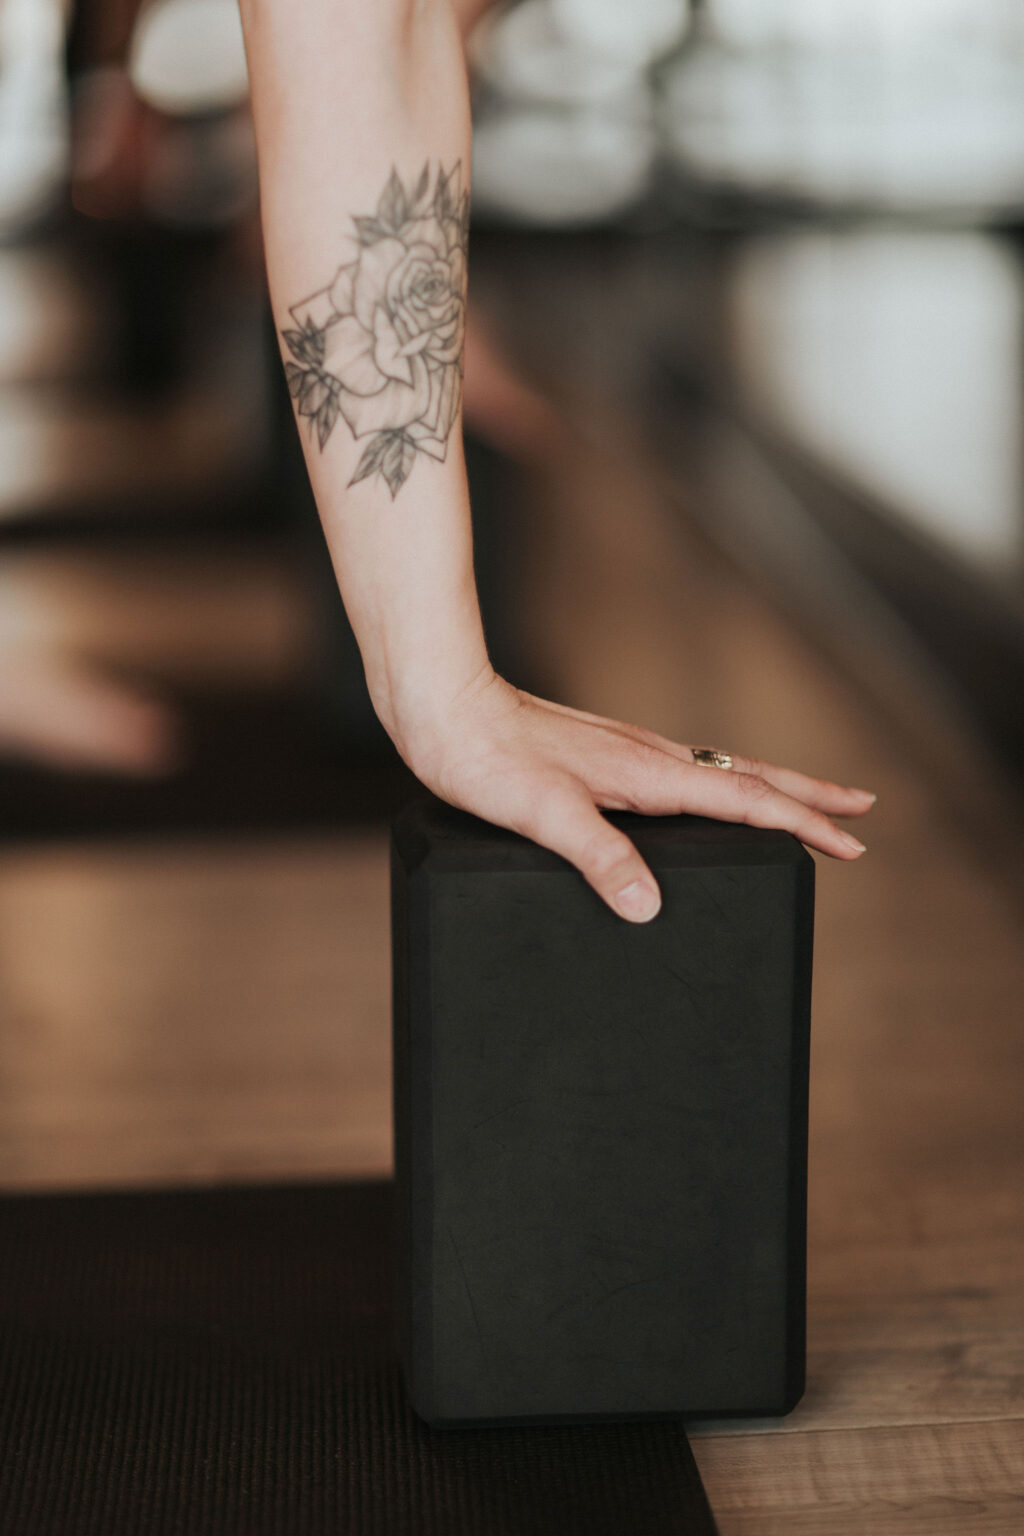
The use of blocks in your practice may ebb and flow based on your season of life – recovering from an injury, pregnancy, etc. Through my own pregnancies and injuries, I discovered how useful blocks can be, now they are an essential component in my practice. Here are 10 ideas for utilizing blocks in your practice. Try them on and let us know what you think! Remember there are many more ways to incorporate blocks. Don’t be afraid to get creative, try things on, and ask your instructor for guidance.

  1. Child’s Pose: Place a block under your forehead to bring the mat closer and reduce strain in your neck. If you experience any compression in your hips, place a block(s) on your calves, allowing your hips to rest on the block. If you are looking to shift or increase the sensation in child’s pose, place two blocks on the lowest setting beneath your triceps. Then, take your thumbs to the nape of your neck for tricep stretch. The more you melt your heart towards the mat, the more feedback you may feel across your chest. 
  2. Mountain Pose: Place a block between your thighs and imagine you could shoot it behind you. This will help with alignment, internal rotation, and activation of your thighs, pelvic floor, and core. For an added challenge in your upper body, place a block between your palms. Press into the block to activate your back muscles and open your chest. Avoid scrunching your shoulders towards your ears.
  3. Downward Facing Dog: Place blocks on the lowest height to provide a lift and cushion for your arms. This can also be a great precursor to the low lunge transition. 
  4. Low Lunge: Place blocks beneath your hands. Remember there are three heights to the block, so customize and progress as needed. Blocks allow for proper alignment and reduce strain in your low back. For something different, place the blocks beneath your hands and come into a deep lunge, opening your heart (like cow). Then, straighten through both legs and round in (like cat). Continue with this movement for a few rounds of breath. 
  5. Chair: Slide a block between your thighs and lightly squeeze. This will help turn on your adductors, glutes, and pelvic floor. Make sure to check your knees are in alignment. Looking to spice up your chair pose? Place a block lengthwise between your palms to activate your back muscles. 
  6. Triangle: Place a block on the second or third height to the pinky-toe side of your front foot. This will prevent dumping into your front leg, lift and strength in your side bodies, and opening across your heart space. If the practice transitions into balancing half-moon, bring your block with you! 
  7. Runner’s Lunge: Blocks placed under the palms or forearms can improve alignment and reduce strain in runner’s lunge. If you are looking to release tension in your neck, place a block on its highest height under your forehead. Allow your neck to drape downward and feel the tension melt away. You can always layer a block underneath to add additional height. If you feel pressure on your back knee, a block under your knee can feel really nice. This is also a great option to feel the posture slightly differently – typically into the front of your thigh and/or hip flexor. 
  8. Seated Forward Fold: A block under your sit bones in seated forward fold can create a little more space, especially if you have a posterior pelvic tilt and/or tight hamstrings. The block allows you to find a little more length and provides a different sensation than no block. To reduce strain and discomfort in your hamstrings, find a slight bend in your knees and place a block under the back of each thigh. This will help close the space between you and the mat.  If you notice any strain in your back or neck, placing a block on either side of your legs can provide support. This helps you find length out of your spine and protects your alignment. Lastly, if reaching for your feet is comfortable and you are looking for a little more intensity, place a block at the base of your feet. Grasping the block will add several inches onto the length of your legs. Use caution to not over stretch, which could result in injury. Remember, as your yoga practice and flexibility progresses, so may the way you utilize blocks, especially in a seated forward fold. 
  9. Half Pigeon: I like to say blocks in half pigeon are your BFF! For the ultimate duo, place one block under your back hip to close the space between your hip and the mat. Place the second block under your forehead on any of the three heights. A block under your back hip will reduce strain and discomfort and allow for a safer stretch. The block under your forehead is like a pillow- a gentle reminder to release tension from your traps, neck, and jaw. 
  10. Supine Twist: As you draw your leg across your chest, allow it to rest on a block(s). This added support under your thigh can reduce pinching in your low back and allow for a gentler stretch. Remember, the block has three heights, so customize this to what you need. For added comfort, wedge a block lengthwise along your low back. This provides a pillow of supports to relax even deeper into the stretch. The incorporation of blocks in supine twist can make the shape more comfortable and accessible, but also shifts the sensation from a common yoga posture to simply feel it differently on your mat.  

Explore these block variations and discover how they can enhance your yoga practice. What are your favorite ways to utilize blocks in your practice? Drop a comment below!

2024 Power Life, All Rights Reserved.
Built with 🤍 by Blink Consulting

2024 Power Life, All Rights Reserved.
Built with 🤍 by Blink Wellness

Village Pointe Studio Parking

Parking available in the Scheels Parking Lot.

Leave us a message. 👋

"*" indicates required fields

This field is for validation purposes and should be left unchanged.

About Kirk: 

Kirk was working 80-hour weeks and wearing his shoulders as earrings when he found yoga in 2005. Forever the competitive athlete, he loved the physicality of yoga. When the spiritual and philosophical side of yoga were exposed to him, Kirk was hooked. Yoga provided him with what other activities couldn’t -- the ability to foster the benefits of practice both on and off of the mat. Yoga was something that Kirk could bring into all aspects of his life. 

Kirk knows that yoga can be intimidating, so he crafts a class that is playful and inviting, while still being challenging and safe. His creatively planned classes build strength and flexibility in your body and mind while establishing clarity, giving you more confidence to overcome obstacles in your life, and keeping you injury-free. His classes are themed with a message that is relatable and will inspire you to take it with you off your mat. Kirk has been teaching yoga since 2008 and lead his first teacher training in 2012. Where Kirk truly shines is in coaching, developing and bringing out the best in others.  

Kirk enjoys traveling (40+ countries to date!), snowboarding, and cherishes time with his wife and two daughters. 

About Christen: 

Christen Bakken’s yoga journey began in 1998 in a Bikram studio that provided a safe and secure place to practice. She saw the yoga mat as a place to remember her purpose and a place to play. As she continued her studies and began her journey to teaching in 2006, Christen infused yoga classes with devotion and the yoga mat became a place of personal transformation and healing. Her classes are filled with laughter, song, sweat, and usually heart openers. In 2013, Christen began training yoga teachers. This is the place where she finds the most joy - in community with folks looking to grow and be of greater service in their homes, on their mats, and in the world. Over the years, she has led trainings in Denver, the Midwest, Florida, and now abroad. She has trained in continuing education modules, 200-hour, 300-hour, and 500-hour programs. Beyond the mat, Christen is a passionate adventure seeker - she loves to bike, snowboard, and spend time with her husband and pups. She sees each day as a blessing and hopes to remind all who interact with her of this truth.  

Two Light Studio Parking Information

We validate parking for THREE garages in the area!

  • Two Light garage located directly north of the studio. Please bring your ticket inside for validation.

  • Three Light garage at Main and Truman. Garage entrance on Truman. Please bring your ticket inside for a validation sticker.

  • Power & Light garage at 13th and Grand. Please ask for a parking pass at the studio front desk. (Hot tip: the Power & Light garage has a ton of space! But be sure to give yourself a little extra time to walk to the studio.)

If you find that you are running a couple minutes late due to parking, please call the studio to let the instructor know to wait for you before locking the doors.

Blackstone Studio Parking

  • We have partnered with our friends at Greenslate to provide 1 hour and 15 minute validated parking for Power Life students in the lot at 36th and Harney (just south of the Cottonwood Hotel). Read below to learn how to take advantage of this perk:

    • Step 1: Scan the QR code located in the lot.

    • Step 2: Select your destination (i.e. “yoga studio”).

    • Step 3: Ask for the validation code at the Blackstone studio front desk and enter it on your phone.

    • Step 4: You are all set! Have fun at class!

    Please note:

    • The validation provided by Power Life and Greenslate is for 1 hour and 15 minutes. Need to add additional time to your parking space? You can do that conveniently from your phone!

    • This option is valid once per day per license plate.

    • Please do NOT park in the Crescent Moon lot − you will be towed!

East Village Studio Amenities

  • There is a paved lot and gravel lot on the West side of the building.

  • Meters on Court and 4th (by Peace Tree) for $0.25/hour, 9am-9pm Mon. – Sat. 12-hour max

  • Meters on 4th (to the North) for $1.25/hour. Mon – Sat. 4-hour max.

  • All meters are free on Sundays and major holidays.

10 Ways to Incorporate Blocks to Elevate Your Practice Info